11/ 23/ 2021
Our Favorite DIY Crafts and Decorations for the Holiday Season
The holidays are just weeks away! If you’re looking to add some unique décor to your home this year, let your creativity flow with these festive DIY decorations. Whether you’re searching for specific holiday crafts or some winter-themed pieces you can leave up all season long, we’ve got you covered with simple do-it-yourself projects.
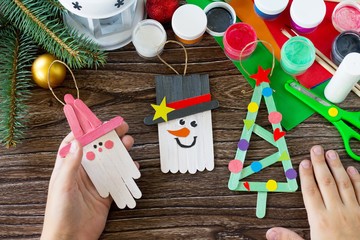
1. DIY Popsicle Stick Ornaments

For the perfect kid-friendly DIY, look no further! As a fun activity for kids and parents alike, these popsicle stick ornaments are an adorable homemade accessory to add to your Christmas tree.
What You’ll Need:
- Regular popsicle (or craft) sticks
- Paint
- Twine or yarn for hanging
- Scissors
- Strong-hold glue
- Optional (for decorating): glitter, pom-poms, stickers, googly eyes
Instructions:
- Assemble craft sticks into desired shape (Christmas tree, snowman, Santa, etc.)
- Paint sticks the desired colors
- Once dry, apply glue to the sides of the sticks and adhere them together
- Add decorations as desired
- Cut about 4 inches of twine or yarn, tie into a loop, and glue on the back of your ornament
- Hang on your tree!
2. DIY Personalized Wrapping Paper
Add a special touch to your gifts this year with these personalized wrapping paper ideas! Whether you’re a frequent crafter or you’re new to the world of do-it-yourself projects, these designs are achievable for any skill level.
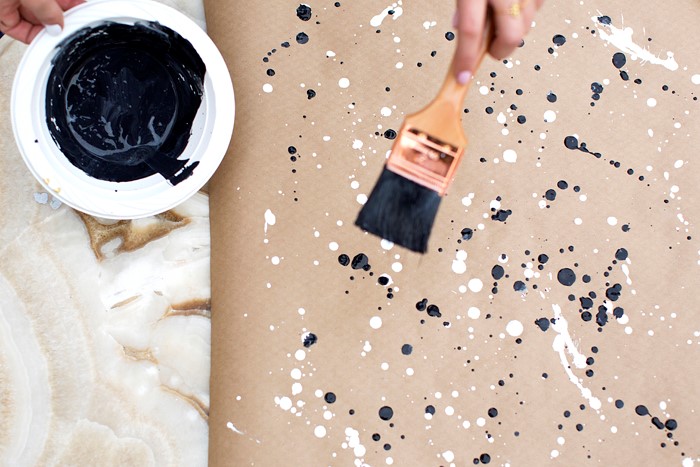
Splatter Paint:

As a fun and contemporary design, splatter paint wrapping paper will certainly attract the attention of your friends and family. When attempting this craft, we recommend moving your supplies outside – this project will get messy!
What You’ll Need:
- Wrapping paper (any solid or metallic color)
- Paint colors of your choice
- Paintbrushes
Instructions:
- To get started, lay your wrapping paper on a table, or hang up outside.
- You can choose to decorate large sections at a time or pre-cut your paper to fit the various sizes of your gifts. Pour your paint colors and dip your brush into the color of your choice.
- Flick your brush so your paint splatters on the paper and repeat with your desired colors until you’re happy with the result.
- Once your paint is dry, it’s time to wrap your presents!
Kraft Paper Stamp Art:

Have some festive stamps lying around? Decorating your paper with stamp art is a simple way to achieve personalized wrapping for your gifts. Choose a color scheme and a few stamp designs, and you’re good to go!
What You’ll Need:
- Stamps (holiday or winter-themed)
- Ink (any color of your choice)
- Kraft paper
Instructions:
- Once you’ve chosen a color scheme and a few stamp designs, lay out your wrapping paper on a flat surface.
- Stamp your ink in your desired pattern and let dry.
- Once your paper is dry, time to wrap your gifts!
3. DIY Winter Floral Centerpiece

If you’re looking to maximize your creativity, spice up your dining room or coffee table with a holiday centerpiece. For those new to the floral arranging process, we’ve created simple instructions for you to construct a stunning centerpiece to last all winter long.
What You’ll Need:
- Artificial flowers (include a variety of sizes and colors for dimension)
- Artificial greens, leaves, or small branches
- Moss
- Dry foam
- Container or vase
- Wire cutters
Instructions:
- Begin by cutting your foam into a few pieces to fill most of the space in your container or vase.
- Start with your largest artificial flowers (around 3-5 stems), trim the stems, and place them into the foam.
- Using your smaller flowers, trim those stems and fill in the spaces until your container or vase looks full.
- Add your moss over any visible foam to give your arrangement a natural look.
- For added dimension, feel free to add longer artificial greens or small branches to provide wintry accents throughout the centerpiece.
- If you’re looking for a challenge and want to use real flowers, just swap your dry foam for wet floral foam, and grab a pair of floral shears!
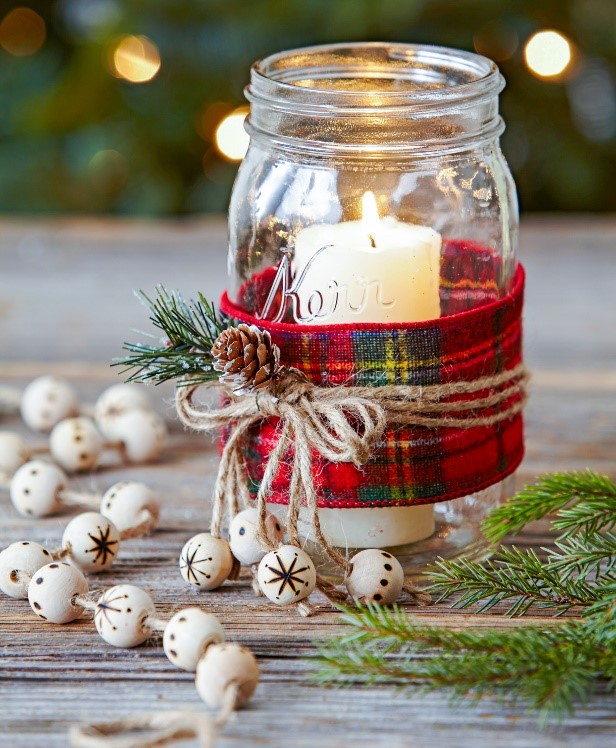
4. DIY Candle Holders

For the perfect customizable project, you’ll adore these do-it-yourself candle holders. With a few simple supplies, you’ll easily add a special touch to your home this upcoming holiday season.
What You’ll Need:
- Mason jars
- Pillar candles (to fit inside the mason jars)
- Optional, for decorating: Ribbon, twine, miniature pinecones, glitter, etc.
- Hot glue gun or strong-hold glue
Instructions:
- To get started, begin by decorating the outside of your mason jar.
- For a Christmas-themed decoration, we suggest gluing a large plaid ribbon around the outside of your jar and tying a twine bow around the ribbon.
- For an extra touch, add a small piece of evergreen and a mini pinecone on your twine bow.
- For a Hanukkah-themed jar, we recommend gluing a large silver ribbon on the outside of your jar, followed by a thinner blue ribbon overtop, tied into a bow.
- Once you’ve decorated your jars, place your pillar candles inside, and you’re all set.
These simple mason jars are a festive addition to any celebration.
5. DIY Gift Wrapping Décor

Last, but certainly not least - gift wrapping décor!
What You’ll Need:
- Wrapping paper of your choice
- Scissors
- Twine, yarn, or ribbon
- Tape
- Optional: strong-hold glue, holly, mistletoe, pinecones, berries, etc.
Instructions:
- Wrap your gift with the paper of your choice.
- Cut your twine, ribbon, or yarn to the appropriate length to fit around your gift, layering the ribbon as you see fit.
- For an additional touch, glue or tape small pieces of holly, miniature pinecones, or berries to the bow.
________________________________
We hope you’ve enjoyed our favorite holiday do-it-yourself decorations. Wishing you a very joyful holiday season!


